
Get Listed On Google With Video Sitemap

Google introduces video sitemap. It is created to help get your videos indexed on Google Video Search, that is, videos that are hosted on your own website, not embedded from video sharing sites.
By submitting this video-specific Sitemap together with your standard Sitemap, you can specify all the video files on your site, along with details such as the video player location, thumbnail preview location and the URL of the page where the video is.

Google can crawl the following video file types: .mpg, .mpeg, .mp4, .mov, .wmv, .asf, .avi, .ra, .ram, .rm, .flv.

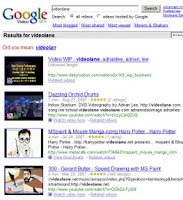
Search results will contain a thumbnail image, title description. In addition, your video may also appear in other Google search products.

If you have some video in your own webhosting server now, this is the time to get it listed on Google and get some additional exposure for your website.

Here is how to submit a Video Sitemap to Google.
  1. Create a Video Sitemap and save it at a publicly accessible URL.

  2. Sign into Google webmaster tools with your Google Account.

  3. Add your site to your account. Your site will be the URL to the directory at which you've placed your Video Sitemap.

  4. Click Add a Sitemap beside the site.

  5. Select Video Sitemap.

  6. Type the URL to your Video Sitemap in the provided field. Make sure you include the entire URL.

  7. Click Add Video Sitemap.


Thanks for watching! :)
http://www.lulu.tv/vlog/videolane

Adrian Lee
http://videolane.com/
http://instantviralvideo.com/
http://youtube.com/videolane
http://adriansjournal.blogspot.com/

PS:
Learn the secrets of dvd and internet video production, sign up for my free newsletter now...
http://www.videolane.com/?Free_Newsletter

Comments

  1. Anonymous12:54 am

    ...I started using them the moment the option was released by Google.

    Soon got fed up hand coding the XML file and so created some software to
    make the valid XML file.

    Now I am giving it away free!

    http://www.videositemappro.com

    Version 1.0 at the moment but will be adding too it soon.

    Plus I think it is the worlds FIRST video sitemap software?

    Enjoy.

    Kind Regards

    Marc Liron
    Microsoft MVP
    www.marcliron.com

    ReplyDelete

Post a Comment

Popular posts from this blog

Macbook Air M1 Case

I bought a transparent case for my MacBook Air M1 . It came with a free screen protector, a keyboard cover, and some rubber plugs to cover the ports. Check it out! https://youtu.be/d-wALSd3nn8 I didn't expect the rubber plugs. It was a nice surprise. The case fits snuggly, with access to all the ports. The keyboard cover is almost invisible to the eye. I have no intention to use the screen protector. Why? I need to see the true color of the display for my YouTube videos. ~ Adrian Lee  @Adrian Video Image  The video was recorded on iPhone 12 Pro Max with Filmic Pro app in 4K 60fps and edited with Capcut.

Sony Vegas Pro 8 Tutorial - Multicamera Editing

Sony Vegas Pro 8 makes it easier to edit videos from different cameras right from the timeline. You can capture and edit video for a single scene from 2 or more cameras or for a single scene shot a few times with one camera. Here is a tutorial of a Multicamera Edit of a drama I shot. The drama was acted out four times to the public and being a non-profit organization, the client have budget only for one videographer. For each of the 4 acts, the camcorder (Sony HDR-FX7 High Definition Camcorder) was placed at 4 different positions and shot in various angles. Multicamera edit is accomplished in only 8 steps with the Sony Vegas Pro 8. Step #1: Capture Multicamera Video Clips Use the normal Sony Vegas Video Capture function to capture recordings from each camera. Give each capture filename a unique name. Enable scene detection before capturing so that each segment is captured as a separate clip. Step #2 : Layout Video Clips on Timeline Drag and drop video clips over each other on the...

FCPX - The storage device "Macintosh HD" is almost full

The message "The storage device Macintosh HD is almost full" appeared when I was editing a video with Final Cut Pro X on my new Apple Macbook Air M1.   Final Cut Pro Taking up Too Much Space  My Macbook Air M1 had only 256GB of storage onboard. My raw footage was only about 9GB. The biggest file was the FCPX project files itself at about 140GB! How did 9GB become 140GB? There is not enough disk space for my Final Cut Pro. Why Is Final Cut Pro Taking up So Much Storage Final Cut Pro renders files in high-quality media so that we can playback our edits smoothly direct from the timeline.  It creates multiple HUGE high-quality files of our footage in the background.   It is a good thing, so as to maintain high-quality final edited video, BUT not a good thing for a laptop with only 256GB. How to Clear Disk Space on Final Cut Pro The question is how to delete the rendered files in FCPX? 1. Select the library in FCPX...  2. Go to Files > Delete Generated L...