How To Convert Betacam SP To MiniDV?

I wonder why some video houses still produce videos on analog Betacam-SP. They should stop wasting clients money and make videos in High Definition or HD.

We all know clients cannot play and watch a video recorded in Betacam-SP. We do know all of us can easily play DVD, mini-DV and the up-and-coming HDV.

In today's tutorial, I will go through the process of transfering Betacam-SP to mini-DV. I do this frequently for clients, so that they can watch their videos while preserving high quality.


Betacam SP to MiniDV
using
Sony Betacam SP Player
and
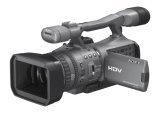
Sony MiniDV CamCorder
  1. Connect the Betacam Player XLR audio outputs to the MiniDV Camcorder Line audio inputs using the cable provided with the camcorder and a pair of XLR adaptors.
  2. Connect the Betacam Player s-video output to the MiniDV Camcorder s-video input using an s-video cable.
  3. Power up the units.
  4. Set the MiniDV Camcorder to VTR mode, AV in.
  5. Insert a blank MniDV tape into the MiniDV Camcorder.
  6. Insert the Betacam SP tape into the Betacam Player.
  7. Play the Betacam and start recording on the MiniDV Camcorder.

End

Comments

  1. Anonymous3:05 pm

    Hi Adrian. Nobody's money is being wasted if they orginate on Betacam SP. Betacam Sp is a terrific archival format and is much easier to playback then trying to decipher the FIFTY PLUS HD formats that currently exist, with more on the way!

    ReplyDelete
  2. Anonymous11:31 pm

    For consumer videos, acquiring on miniDV or HDV is definitely of no issue. However, when it comes to broadcast or professional applications, Betacam SP despite being an analog format that is existing for over 20 years, it is still one of the best analog video formats available.

    Betacam SP footage can be digitised at 8bit Uncompressed 4:2:2 video whereas miniDV are compressed at 4:2:0 resolution. This can mean a lot of difference in post production applications like color grading & chroma key effects shot.

    Betacam SP is definitely a more robust format and like what Alessandro mentioned, it's a terrific archival format.

    In most post production applications for broadcast, use of timecode is also very important and miniDV lacks such critical feature.

    ReplyDelete

Post a Comment

Popular posts from this blog

Macbook Air M1 Case

I bought a transparent case for my MacBook Air M1 . It came with a free screen protector, a keyboard cover, and some rubber plugs to cover the ports. Check it out! https://youtu.be/d-wALSd3nn8 I didn't expect the rubber plugs. It was a nice surprise. The case fits snuggly, with access to all the ports. The keyboard cover is almost invisible to the eye. I have no intention to use the screen protector. Why? I need to see the true color of the display for my YouTube videos. ~ Adrian Lee  @Adrian Video Image  The video was recorded on iPhone 12 Pro Max with Filmic Pro app in 4K 60fps and edited with Capcut.

Sony Vegas Pro 8 Tutorial - Multicamera Editing

Sony Vegas Pro 8 makes it easier to edit videos from different cameras right from the timeline. You can capture and edit video for a single scene from 2 or more cameras or for a single scene shot a few times with one camera. Here is a tutorial of a Multicamera Edit of a drama I shot. The drama was acted out four times to the public and being a non-profit organization, the client have budget only for one videographer. For each of the 4 acts, the camcorder (Sony HDR-FX7 High Definition Camcorder) was placed at 4 different positions and shot in various angles. Multicamera edit is accomplished in only 8 steps with the Sony Vegas Pro 8. Step #1: Capture Multicamera Video Clips Use the normal Sony Vegas Video Capture function to capture recordings from each camera. Give each capture filename a unique name. Enable scene detection before capturing so that each segment is captured as a separate clip. Step #2 : Layout Video Clips on Timeline Drag and drop video clips over each other on the...

How to Connect an External Video Camera to MacBook Pro for Live Streaming

How to use an external camera on Mac? In this video, I demonstrate how I connect my GoPro (or other cameras) to my Macbook Pro for live streaming? See the links below the video for the list of equipment required for the setup.  Links... - Micro-HDMI to HDMI cable... https://amzn.to/2VnZNcC - HDMI to USB Capture Device...   Elgato Cam Link 4K... https://amzn.to/3a0Gcob   Alternatives...   Ansten... https://amzn.to/2W4mzGM   Unisheen... https://amzn.to/2y9BDKS   Magewell... https://amzn.to/3b2StJX   ATEM Mini... https://amzn.to/2RtsDam   Treaslin... https://amzn.to/2YidpHJ - USB to USB cable... https://amzn.to/2VnhpVX (Not required for Elgato Cam Link / USB to USB-C required for New MacBook pro) - GoPro Hero7 Black... https://amzn.to/3a8oiA9 - Gekkopod Flexible Tripod Stand... https://amzn.to/2yOyosF Like this video? Buy me coffee... 😋 https://www.buymeacoffee.com/VideoLane